Are you ok with your computer’s recent hardware such as CPU and motherboard? Are they providing you with the services that you have always expected?
It’s our human nature that we are always willing to change or upgrade our computer’s CPU or motherboard especially when they start slowing down your device and gradually become defective pieces. That’s why every user comes up with a common question i.e. Can I upgrade my motherboard and CPU without reinstalling Windows 10? Why this question is a topic of concern?

At present, many computers used either at offices or at home don’t have any issue in finishing a fresh installation of Windows 10. But the job is a little tiresome that’s why the users usually keep it away. Along with the OS installation, the configuration of the system settings, reinstallation of all the key applications, re-transferring the data that was earlier removed because of the clean installation also needs to be done. There are a few programs that need to be reactivated with time. That’s the reason why most users want to upgrade the CPU and motherboard of their PC without reinstalling Windows 10. In the upcoming sections of this article, we will be discussing how can you upgrade your motherboard and CPU without reinstalling Windows 10 step-by-step.
Method 1: Use MiniTool Shadowmaker
This software is one of the popular windows backup software that is used to help the users of Windows 7/8/10 to back up all the files, the operating system, the partition, and the complete disk for protecting the data. If something goes wrong with your PC, you can go for a quick recovery from the disaster. Along with this, the feature of universal restore permits the user to restore the Windows OS to any other computer that has different hardware. This is what every user needs if they try to replace the motherboard and change the CPU without reinstalling Windows 7/8/10. There will be no changes in your previous accustomed system settings.
It also provides the feature of Media Builder that can help you to make a USB drive or bootable disc. The system can be completely restored to another computer that has different hardware. After you have successfully downloaded the software, you can begin the process of upgrading the hardware. Here we will be taking an example of ‘Replace a motherboard without reinstalling Windows 7’
Operation 1: Backing up Windows 7 before you start upgrading it
- Step 1: Open up the ‘MiniTool ShadowMaker’ trial edition.
- Step 2: A home page will be displayed on which you can set up the backup of the Windows if you haven’t created any. Follow the instructions to visit the ‘Backup’ tab.
- Step 3: All the partitions that are related to the system get selected as the source of backup by default along with the destination folder. Tap on the option of ‘Back up Now’ present in the ‘Manage Tab’ for performing the task.
Operation 2: Making a bootable drive or disc for the ‘Universal Restore’ after upgrading the hardware
- Step 1: Go to the trial edition of MiniTool ShadowMaker and select the option of ‘Keep Trial’ and then choose ‘Local backup’.
- Step 2: There will be an option for ‘Media Builder’ under the ‘Tools’ tab. Select it.
- Step 3: Click on the option of ‘WinPE-based media with MiniTool plug-in’ for continuation.
- Step 4: Select the destination of the media which can be an ISO file, USB flash drive, USB hard drive, and DVD/CD. Begin the work of creation. At the end of the process, you’ll be having a recovery drive that contains the backup of your system.
Also Read: How to Check CPU Temperature – Easy Methods
Operation 3: Upgrading CPU & motherboard
After you have successfully created a bootable DVD/CD or Bootable USB drive with the backup of your system, start changing the CPU and motherboard.
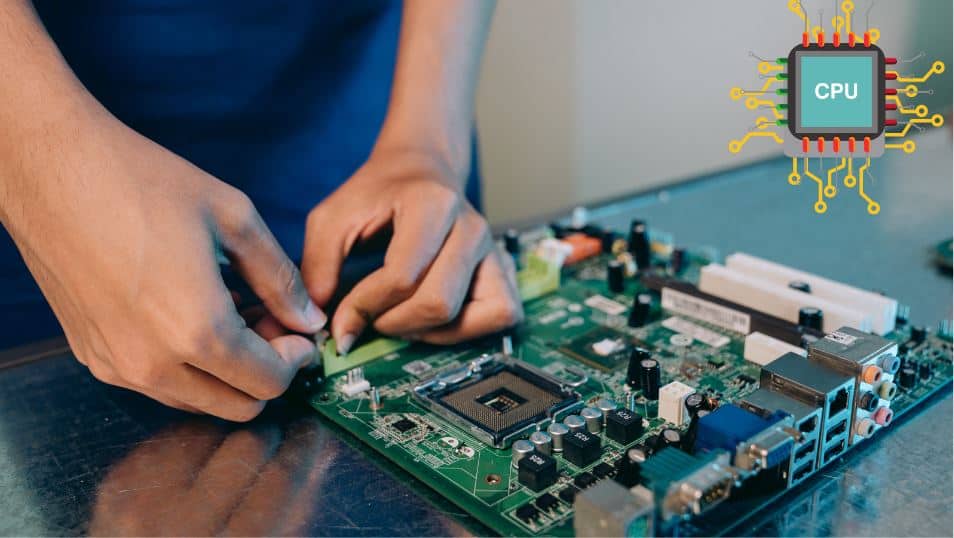
For replacing the non-working motherboard with a new one in Windows 7, make sure that the motherboard you selected can be easily installed in case of your computer, and be careful with the motherboard’s port. Select the CPU according to the model of the motherboard that you selected and the level of performance. After completing the process of selection, upgrade them by taking all the measures.
Operation 4: System restoration to any other motherboard that is not similar
If you have changed the CPU and motherboard, Windows 7 will not work. Firstly, you have to perform a clean installation of Windows and restore the operating system because maybe the already installed Windows chipset is incompatible. But you do not need to worry as MiniTool ShadowMaker software has a unique feature named ‘Universal Restore’ that enables you to restore the system to another PC that does not have similar hardware. You can use this feature for performing the restoration after you have changed the motherboard and CPU without reinstalling Windows 10/8/7.
- Step 1: Alter the boot order and boot the Windows by using any bootable media that you have made in operation 2.
- Step 2: After a while, the bootable edition of MiniTool ShadowMaker will get started. Visit the ‘Tools’ tab to select the feature of ‘Universal Restore’.
- Step 3: MiniTool ShadowMaker will automatically detect and enlist the OS that is installed on the hard drive. Select Windows 7 and choose the option of ‘Restore’ for repairing the unbootable operating system after you have upgraded or replaced the CPU and motherboard.
Method 2: Alter Registry
It’s a little complicated process. Here we will be discussing two cases that will help you in upgrading your CPU and motherboard without reinstalling Windows 10 just by changing the registry.
Case 1: Registry modification before you replace the CPU and motherboard
- Step 1: Simultaneously press and hold on to the ‘Win + R’ keys to display the ‘Run’ dialog, enter ‘regedit’ in the text box, and press ‘ok’ for opening ‘Registry Editor’.
- Step 2: In the coming window, follow the path:
‘HKEY_LOCAL_MACHINE\SYSTEM\CurrentControlSet\services\msahci’ - Step 3: Double-click on the ‘Start’ DWORD and alter the data value to 0. Enter ‘ok’ to continue.
- Step 4: Alter the following key DWORD data value to 0
‘HKEY_LOCAL_MACHINE\SYSTEM\CurrentControlSet\services\pciide’
Switch off your computer after registry modification and then begin the installation of the new CPU and motherboard. After all of this, the OS of your Windows will boot normally.
Also Read: General Facts: The First Fully 64-Bit Compatible Version Of Android
Case 2: Register modification by using an offline Registry editor after updating the motherboard
- Step 1: After booting up your computer, configure the time, format, language, input method, and keyboard.
- Step 2: Click on the option of ‘Repair your computer’ getting displayed on the screen.
- Step 3: In the options of ‘System Recovery’ select the option of ‘Command Prompt’.
- Step 4: As the CMD window opens, enter the command ‘regedit’ and hit ‘Enter’ for opening the registry editor.
- Step 5: Highlight the key ‘HKEY_LOCAL_MACHINE’
- Step 6: Select ‘Load Hive’ available in the ‘File’ menu for loading the offline registry.
- Step 7: Visit the drive where you have installed the Windows and select the system file. The path is:
C:\Windows\system32\config\system.
Select the ‘Open’ button. - Step 8: Type the name of the key for instance, ‘offline’.
- Step 9: Visit the ‘HKEY_LOCAL_MACHINE\Offline\ControlSet\services\msahci’ and double-click on ‘Start’ for changing the data value to 0.
- Step 10: Perform the same step of modification for the key:
‘HKEY_LOCAL_MACHINE\SYSTEM\CurrentControlSet\services\pciide’ - Step 11: After completing all the modifications, highlight ‘Offline’, and from the file menu, select ‘Unload Hive’ to write back all the alterations you created to an offline registry.
- Step 12: Restart your computer. Specify the SATA mode w.r.t requirements or you can leave it to the default settings in BIOS. Take an exit from BIOS and eliminate the installation disc of Windows 10. Run the OS properly and install all the needed hard disk controller drives.
Also Read: Monitor Randomly Turns Off and On Error (5 BEST Fix)
Conclusion
We hope that you got both the ways that can help you to fix the question that you raised ‘can I upgrade my motherboard and CPU without reinstalling Windows 10?’. The first one is the simple method whereas the latter is a little complicated because it relates to the registry. Try out any of the methods that you think are easy for you to apply and get the best results.


