We all know that usage of the iPhone is increasing day by day and half of the population uses it due to its versatile features which are way beyond phenomenal. This smartphone stands out to be very expensive because of the extra perks which are provided to the customer. It’s perfect in everything from camera, to apps alongside storage but at times a certain set of disadvantages also comes associated with this device for which users have to spend huge amounts of money from their pockets.

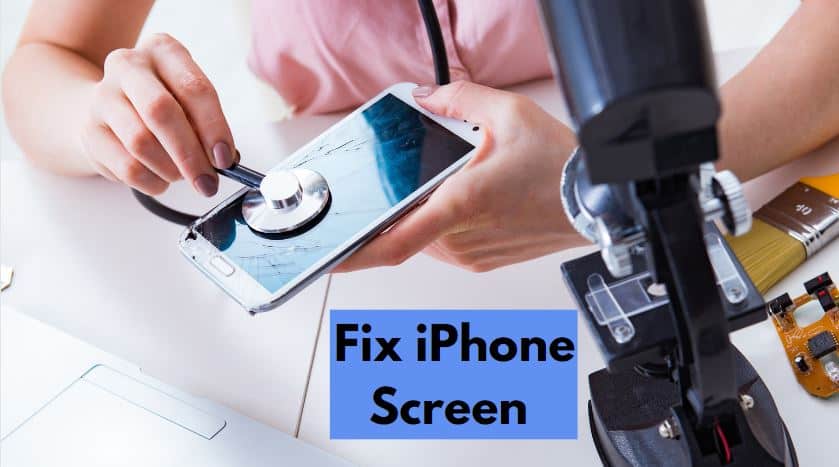
Starting from the baseline the prominent disadvantages of purchasing an iPhone are less battery time as the device has a very short life and the battery gets drained out quickly on excessive usage. Another one is the screen damage whose repair cost breaks all the pipelines of the money flow and one has to spend a huge bunch of money repairing the iPhone if it gets broken accidentally due to certain reasons. Though you’re lucky if your iPhone is under warranty period because then it gets repaired free of cost which sounds to be good so far. Moving on, here we will discuss two prominent methods of fixing an iPhone screen and what needs to be avoided in such scenes.
Also Read : Photos Privacy Issue: Solution To Lock Your Photos On iPhone
Method 1: With Ifixit Kit You Can Do It Yourself
| Note: Before starting with this procedure make sure to keep the battery of your iPhone below 25% because the device comprises Lithium-ion batteries which have chances of getting exploded if punctured accidentally. |
- Step 1 – Screw removal from the phone base : Use a sharp screwdriver of the star shape and unscrew the screws present at the iPhone’s base. Don’t drop them on the floor after unscrewing them.
- Step 2 – Use packaging tape to cover the screen: If your phone’s screen is broken into numerous pieces, use packaging tape instead of a suction cup and paste it on it. It will also protect you from getting any cuts by the broken glass pieces.
- Step 3 – Heat application from the phone’s bottom edge: Heat is applied to the screen to lose the adhesive. A hairdryer can be used for any heating pad or heating gun that is available in the screen repair kits.
- Step 4 – Use of suction cup to the screen: Apply a small suction cup from the iPhone’s bottom area. Firmly press it down on the screen to make it stick. Use a suction cup that has a metal ring for easy handling. Don’t cover the home button while applying the tape.
- Step 5 – Pull the suction cup upwards: Hold your phone and try to pull the suction cup upwards firmly. Repeat it several times unless you find the screen coming away from the frame. When it is done, shift the suction cup to the screen corner to increase the leverage while pulling.
- Step 6 – Pry tool insertion: After pulling away from the screen successfully, insert a thin pry tool beneath the screen and slide it along the bottom to loosen the screen.
- Step 7 – Pry tool sliding: Gradually start sliding the pry tool along every side of the screen. This will loosen the screen evenly. Don’t try to pull the screen from any of the sides strongly as it might cause damage to your iPhone’s screen.
- Step 8 – Screen upliftment: Place your fingertips on the bottom of your iPhone to hold it. Keep your other hand on the iPhone by keeping the thumb on the screen whereas your middle and index finger on the opposite sides. Lift the screen firmly by keeping an angle of 90 degrees to the right.
- Step 9 – Removal of connector shield: After you open the display, you can see screws holding a metal plate. Unscrew the screws. You might find more than one connector shield depending on the model.
- Step 10 – Releasing connectors: Just below the connector shield, you can see three bone-shaped connectors that have an important role to keep the bottom of the phone and screen intact. Release those connectors one by one. Use fingertips for firmly prying up the ribbons or connectors.
- Step 11- Removal of the earpiece top metal plate: After lifting the screen, you can see a small metal plate present on the top area of your iPhone. Lift the metal plate with the help of a sharp star-shaped screwdriver by unscrewing the two small screws holding the plate.
- Step 12 – Removal of Home button screws: At the iPhone’s bottom, a metal plate is shielding the home button. Remove the screws using the screwdriver.
- Step 13 – Lifting of backplate: You can see two screws on the backplate and the other two screws present on each side of the iPhone. Use a screwdriver to unscrew them and remove the backplate.
- Step 14 – Lift the plate and home button: Push the button while turning over the iPhone. Gradually remove the plate by peeling it. Don’t pull or twist it as it will cause damage to it. Remove the connectors present on the top of the screen.
- Step 15 – Lose the front assembly: Unscrew the front speakers present at the top of the display to loosen the speakers.
- Step 16 – Speaker flip: Use a spudger that will help you to gently pry the speaker upward from the top edge of the screen. Now you can flip the complete speaker away from the top edge.
- Step 17 – Heat applied on the display top edge: Use a hairdryer, heat gun, or heating pad to apply heat to the front of the display top edge for up to 1-2 minutes. It will lose the adhesive that is holding the microphone.
- Step 18 – Prying the Microphone assembly: Use any pry tool, place it below the microphone assembly and firmly pry it to loosen. Don’t cause any damage to the flex cable.
- Step 19 – Remove sensors and speakers: Keep the pry tool below the flex cable and flood illuminating module near the sensors. Firmly swish and lift the sensors and modules out from the slots. After it loosens, lift the speaker assembly away from the display panel.
- Step 20 – Bottom metal plate removal: In the models of iPhone 11, you’ll see another metal plate. Remove it with the same procedures applied earlier.
- Step 21 – Bottom metal plate installation: For the bottom metal plate installation in the new display. Insert the flex cable into the metal plate through the hole & position the plate on the lower edge at a certain angle. Furthermore, Screw down the metal plate in its place & reattach the cable by using adhesive with display control, metal plate, glue one flex cable with the other.
- Step 22 – Speakers and sensors installation: Place each component in its accurate notch on the display and press them down firmly.
- Step 23 – Screw-in the speakers: After you have placed each component of the speaker assembly, flip it and screw it down in its original place.
- Step 24 – Home button installation: Take out the new screen and place the home screen button in its place. Place the metal plate of the home button on it and screw in them properly.
- Step 25 – Metal plate attachment: After placing all the components in their place, you need to re-attach the metal plate by properly screwing it back.
- Step 26 – Earpiece reattachment: Place the earpiece back on the iPhone’s top right corner by screwing it properly.
- Step 27- Use new adhesive to your iPhone’s back frame.
- Step 28 – Connectors attachment: Place the connectors back into the proper holes by screwing them properly before pushing the other connectors.
- Step 29 – Securing connector shield: After re-attaching the cables from the display, replace and secure the metal cover going over them with appropriate screws.
- Step 30 – Connecting a new screen to your phone: Connect the ribbon-shaped connectors to the display from the new screen & set the metal plate back on the connector and screw them.
- Step 31 – Thrust the new screen: Gently press the screen from top to bottom and screw in the last two screws at the bottom. Now you can switch on your iPhone.
Also Read: Error 4013 In iPhone : Effortless Steps To Resolve This Error
Method 2: Taking Help From Apple Customer Care
This is a hassle-free process as compared to the previous one. As a customer, you need to submit your iPhone to an authorized Apple Service Center where experts from the department will fix the smartphone with ease. It’s advised that rather than trying one’s self, one should submit their iPhone to the service centre so that the technicians repair it smoothly.
Note: “We are not experts; please check with an Apple Center or nearby mobile fix expert”
Final Words
It’s obvious that the more the amount one spends to purchase an iPhone the more is its maintenance expenses and at times issues such as iPhone, screen damage leads to burning a huge hole in the customer’s pocket. So our one-shot advice to all iPhone users would be that one should handle the device properly and should avoid keeping it in risk-prone areas. Though if by chance anything happens then go through this article to see how this problem can be fixed at the earliest.


